
Getting Started With Kotest
Intro
최근 Kotlin을 이용하여 개발하면서 테스트 코드를 작성할때 Kotest를 주로 사용한다. 이전에 작성한 Comparing Testing Library for Kotlin을 보면 Kotest를 이용한 테스트 코드 작성의 장점에 대해서 적어 두었으니 읽어보면 좋을 것 같다.
이 글은 Kotest 공식 홈페이지를 참고해서 내가 사용했던 기능들 위주로 사용방법에 대해서 자세히 다루고 다양한 활용방법을 소개해 본다. 먼저 빠르게 설치해서 사용해 볼 수 있는 방법을 알아보고 좀더 자세한 설정과 사용방법에 대해서 알아본다.
본 글은 Kotest 4.6.1 버전을 사용하였다.
Quick Start
Settings
Kotest는 JVM에서 JUnit 플랫폼 위에서 동작한다. 그래서 JUnit5 runner에 의존성을 가진다. Gradle 4.6버전 이상이라면 아래 설정만으로 Kotest를 사용할 수 있다. 설정은 Gradle + Kotlin을 사용하였다.
tasks.withType<Test> {
   useJUnitPlatform()
}

dependencies {
    testImplementation 'io.kotest:kotest-runner-junit5:$version'
}
Write Test Code
설정이 완료되었다면 테스트 코드의 작성은 간단하다. 테스트 경로에 원하는 클래스를 생성한 후 <테스트스타일>Spec 클래스를 상속하여 사용하면 된다. 다만 사용방법은 2가지가 있는데 DSL을 이용하는 방법과 init함수로 사용하는 방법이 있다.
DSL
internal class DslTest : FunSpec({
    test("this is first test") {
        val name = "hello kotest!"
        val actual = name.length
        actual shouldBe 13
    }
})
init
internal class InitTest : FunSpec() {
    init {
        test("this is first test") {
            val name = "hello kotest!"
            val actual = name.length
            actual shouldBe 13
        }
    }
}
Testing Style
Kotest는 다양한 테스팅 스타일을 제공해준다. 각각의 스타일은 Scala Test, Javascript Test, BDD style, JUnit Test등 다양한 플랫폼에서 영감을 얻은 것으로 상황에 맞는 테스트 스타일을 선택할 수 있다는 것은 큰 매력으로 다가온다. 팀마다 하나의 스타일을 고수할 수도 상황에 맞는 테스트 스타일을 채택하여 사용할 수도 있다. 홈페이지에서도 언급하고 있지만 내 생각도 선택은 자유라 생각한다.
하나의 스타일을 고수하면 일관성을 가져갈 수 있다는 점에서 개발자들이 테스트 작성에 불필요한 고민을 할 에너지를 줄일 수 있다는 장점이 있는 반면 더나은 스타일을 채택할 수 있는 기회를 놓칠 수 있기 때문에 조금 아쉬움이 있고, 여러 스타일을 채택하면 테스트 케이스에 맞는 스타일을 선택할 수 있기 때문에 테스트 가독성을 높일 수 있는 장점을 가져갈 수 있지만 이 다양한 스타일이 오히려 복잡해 보일 수 있는 문제가 생길 수 있다.
개인적으로는 if kakao의 kotest가 있다면 TDD 묻고 BDD로 가!에서 소개한 유닛 테스트와 통합 테스트에서 다른 스타일을 채택하는 방법이 합리적인 선택이 아닐까 생각된다. 통합 테스트나 기능 테스트에서는 특정 스토리를 주고 그게 맞는 테스트 케이스를 작성하는 경우가 맞는데 이럴때는 BDD 스타일로 작성하면 가독성을 많이 높일 수 있고, 유닛 테스트의 경우에는 각 기능별로 테스트 케이스를 작성하게 되는 경우가 많으므로 단순한 테스트 스타일을 채택하는 것이 좋을 수 있다.
서론이 조금 길었는데, 본격적으로 각 스타일을 보고 팀에 맞는 테스트 스타일을 채택하셔 사용하면 좋을 것 같다.
주의할점은 하나의 파일에 테스트 코드를 너무 많이 작성하는 경우 IDEA가 상당히 버거워 하는 경험을 한적이 있다. 적당한 수준으로 파일을 분리하도록 하자.
Fun Spec
Fun Spec은 ScalaTest에서 영감을 받은 테스트 스타일로 test 함수명으로 문자열 테스트 케이스 명을 매개별수로 넣어 테스트 케이스를 작성하는 방법이다. 상당히 직관적이고 심플한 스타일이다.
만약 중첩된 테스트를 표현하고 싶으면 context 키워드를 사용해서 함수를 만들고 context내에 test 함수를 추가하면 된다.
internal class FunSpecTest : FunSpec({
    test("String.length should return the length of the string") {
        val name = "hello kotest!"
        val actual = name.length
        actual shouldBe 13
    }

    context("toInt") {
        test("given number string should return integer value") {
            val number = "12345"
            val actual = number.toInt()
            actual shouldBe 12345
        }

        test("given not number string should return exception") {
            val str = "not a number"
            shouldThrow<NumberFormatException> {
                str.toInt()
            }
        }
    }
})
Should Spec
Should Spec은 Fun Spec과 거의 흡사한 테스트 스타일이다. test키워드 대신 should를 사용하면 된다.
internal class ShouldSpecTest : ShouldSpec({
    should("String.length should return the length of the string") {
        val name = "hello kotest!"
        val actual = name.length
        actual shouldBe 13
    }

    context("toInt") {
        should("given number string should return integer value") {
            val number = "12345"
            val actual = number.toInt()
            actual shouldBe 12345
        }

        should("given not number string should return exception") {
            val str = "not a number"
            shouldThrow<NumberFormatException> {
                str.toInt()
            }
        }
    }
})
Expect Spec
Expect Spec도 Fun Spec과 거의 흡사한 테스트 스타일이다. test키워드 대신 expect를 사용하면 된다.
internal class ExpectSpecTest : ExpectSpec({
    expect("String.length should return the length of the string") {
        val name = "hello kotest!"
        val actual = name.length
        actual shouldBe 13
    }

    context("toInt") {
        expect("given number string should return integer value") {
            val number = "12345"
            val actual = number.toInt()
            actual shouldBe 12345
        }

        expect("given not number string should return exception") {
            val str = "not a number"
            shouldThrow<NumberFormatException> {
                str.toInt()
            }
        }
    }
})
String Spec
String Spec은 가장 단순한 문법을 가진 테스트 스타일이다. 그냥 단순히 테스트 케이스 명을 문자열로 입력한 후 중괄호 내에 테스트 코드를 작성하면 된다.
internal class StringSpecTest : StringSpec({
    "String.length should return the length of the string" {
        val name = "hello kotest!"
        val actual = name.length
        actual shouldBe 13
    }
})
Describe Spec
Describe Spec은 Ruby의 Rspec 이나 Javascript의 Mocha에서 영감을 얻어 생긴 테스트 스타일로 describe와 it의 키워드를 사용한다. 테스트 코드는 반드시 중첩된 테스트 형식을 가져야 하며 describe키워드 내 it함수를 하나 이상 포함해야 한다.
internal class DescribeSpecTest : DescribeSpec({
    describe("toInt") {
        it("given number string should return integer value") {
            val number = "12345"
            val actual = number.toInt()
            actual shouldBe 12345
        }

        it("given not number string should return exception") {
            val str = "not a number"
            shouldThrow<NumberFormatException> {
                str.toInt()
            }
        }
    }
})
Behavior Spec
Behavior Spec는 BDD(Behavior Driven Development) Framework(cucumber 등)로 부터 영감을 받은 테스트 스타일이다. given, when, then, and 키워드를 사용해서 테스트 코드를 작성한다.
internal class BehaviorSpecTest : BehaviorSpec({
    var str: String
    var formatter: DateTimeFormatter
    var actual: LocalDateTime

    given("str is datetime string") {
        str = "2011-12-03T10:15:30"
        `when`("parse LocalDateTime form string") {
            actual = LocalDateTime.parse(str)
            then("actual should be LocalDateTime object") {
                actual shouldBe LocalDateTime.of(2011, 12, 3, 10, 15, 30)
            }
        }
    }

    given("str is custom datetime string") {
        str = "20111203101530"
        and("formatter is ISO datetime") {
            formatter = DateTimeFormatter.ofPattern("yyyyMMddHHmmss")
            `when`("parse LocalDateTime form string and formatter") {
                actual = LocalDateTime.parse(str, formatter)
                then("actual should be LocalDateTime object") {
                    actual shouldBe LocalDateTime.of(2011, 12, 3, 10, 15, 30)
                }
            }
        }
    }
})
Word Spec
Word Spec은 ScalaTest에서 영감을 받은 테스트 스타일로 when, should 키워드를 사용한다. Behavior Spec 테스트 스타일과 유사하게 3단계의 중첩된 테스트 스타일을 가지지만 2단계 중첩도 할 수 있다는 점에서 조금 차이가 있다.
internal class WordSpecTest : WordSpec({
    "String.length" should {
        val name = "hello kotest!"
        val actual = name.length
        "return length of string" {
            actual shouldBe 13
        }
    }

    "number string" `when` {
        val number = "12345"
        "parsed integer" should {
            val actual = number.toInt()
            "return integer value" {
                actual shouldBe 12345
            }
        }

        "parsed long" should {
            val actual = number.toLong()
            "return long value" {
                actual shouldBe 12345L
            }
        }
    }
})
Free Spec
Free Spec도 ScalaTest에서 영감을 받은 테스트 스타일로 단지 - 키워드로 중첩된 테스트를 표현할 수 있기 때문에 스타일 명처럼 자유로운 스타일을 구현할 수 있다.
internal class FreeSpecTest : FreeSpec({
    "String.length" - {
        val name = "hello kotest!"
        val actual = name.length
        "should return length of string" {
            actual shouldBe 13
        }
    }

    "number string" - {
        val number = "12345"
        "when parsed integer" - {
            val actual = number.toInt()
            "should return integer value" {
                actual shouldBe 12345
            }
        }

        "when parsed long" - {
            val actual = number.toLong()
            "should return long value" {
                actual shouldBe 12345L
            }
        }
    }

    var str: String
    var actual: LocalDateTime

    "given str is datetime string" - {
        str = "2011-12-03T10:15:30"
        "when parse LocalDateTime form string" - {
            actual = LocalDateTime.parse(str)
            "then actual should be LocalDateTime object" {
                actual shouldBe LocalDateTime.of(2011, 12, 3, 10, 15, 30)
            }
        }
    }
})
Feature Spec
Feature Spec는 BDD Framework인 Cucumber에서 영감을 받은 테스트 스타일로 feature와 scenario 키워드를 사용한다. Cucumber를 보면 scenario내에 given과 when, then을 적어주어야 하지만 이 세 키워드가 빠져있어서 직접 적어줘야 하는 부분은 조금 아쉽다.
internal class FeatureSpecTest : FeatureSpec({
    feature("parse LocalDateTime") {
        scenario("should return LocalDateTime object when given string") {
            val str = "2011-12-03T10:15:30"
            val actual = LocalDateTime.parse(str)
            actual shouldBe LocalDateTime.of(2011, 12, 3, 10, 15, 30)
        }

        scenario("should return LocalDateTime object when given string and formatter") {
            val str = "20111203101530"
            val formatter = DateTimeFormatter.ofPattern("yyyyMMddHHmmss")
            val actual = LocalDateTime.parse(str, formatter)
            actual shouldBe LocalDateTime.of(2011, 12, 3, 10, 15, 30)
        }

        scenario("should throw Exception when given can't parse string") {
            val str = "test"
            shouldThrow<DateTimeParseException> {
                LocalDateTime.parse(str)
            }
        }
    }
})
Annotation Spec
Annotation Spec는 JUnit로 부터 영감을 받은 테스트 스타일로 JUnit과 동일한 어노테이션과 스타일을 사용한다. Junit을 마이그레이션할때 유용하게 사용할 수 있다.
internal class AnnotationSpecTest : AnnotationSpec() {
    @Test
    fun length_should_return_th_length_of_the_string() {
        val name = "hello kotest!"
        val actual = name.length
        actual shouldBe 13
    }
}
Assertions
Kotest가 JUnit에 비해 좋다고 생각한 부분중 가장 큰 부분이 바로 손쉬운 Assertions이다. 대부분의 경우에 shouldBe 키워드로 단언을 수행할 수 있지만 상황에 맞게 사용할 수 있는 여러 Matchers가 존재한다.
Simple Matchers
Kotest의 Matcher는 2개의 스타일을 제공한다. 하나는 Extension을 이용한 단언과 Infix functions을 이용한 단언이다. 각 키워드별 동작은 아래 코드를 통해 유추해 보면 좋을 것 같다.
"simple matchers test" {
    "".length.shouldBe(0)
    "".length shouldBe 0

    "a".shouldNotBe("")
    "a" shouldNotBe ""

    val numbers = listOf(1, 2, 3, 4, 5)
    numbers.shouldContain(3)
    numbers shouldContain 3

    numbers.shouldContainAll(listOf(1, 2, 3, 4, 5))
    numbers shouldContainAll listOf(1, 2, 3, 4, 5)

    "hello kotest".shouldStartWith("hello")
    "hello kotest" shouldStartWith "hello"

    "hello kotest".shouldEndWith("kotest")
    "hello kotest" shouldEndWith "kotest"
}
Multitude of Matchers
하나의 수행결과에 대해 여러 단언을 수행해야 하는 경우 체이닝 함수를 통해 중복을 줄이고 가독성 높은 테스트 코드를 작성할 수 있다.
"multitude of matchers test" {
    val imageUrl = "https://www.google.com/images/branding/googlelogo/2x/googlelogo_color_272x92dp.png"
    imageUrl.shouldContain("google")
        .shouldStartWith("https")
        .shouldEndWith(".png")
        .shouldBeLowerCase()
}
Exceptions
예외에 대한 테스트는 shouldThrow 키워드를 통해 단언을 수행할 수 있다.
"exceptions test" {
    assertThrows<NumberFormatException> {
        "test".toInt()
    }

    val actual = assertThrows<Exception> {
        throw Exception("test message")
    }
    actual.message shouldBe "test message"
}
Soft Assertions
Soft Assertions는 assertSoftly키워드를 이용하여 다수의 단언을 묶어서 수행하기 위한 용도로 사용한다. 단순히 shouldBe와 같은 Matcher를 여러번 수행함으로써 다수의 단언을 수행할 수 있지만 이런 경우 앞선 단언이 실패하는 경우 후속 단언을 수행하지 않고 테스트가 멈추기 때문에 후속 단언의 성공여부를 앞선 단언이 성공하기 전까지 판단하기 어렵다. 나는 주로 equals를 재정의하지 않은 객체의 프로퍼티들을 검증할 때 주로 사용한다.
"soft assertions test" {
    val sut = Person(
        name = "james",
        age = 30,
        email = "test@gmail.com",
        phone = "010-1111-2222"
    )

    assertSoftly(sut) {
        name shouldBe "james"
        age shouldBe 30
        email shouldBe "test@gmail.com"
        phone shouldBe "010-1111-2222"
    }
}
Isolation Modes
Kotest는 Isolation Modes를 통해 테스트 케이스마다 테스트 인스턴스를 어떻게 생성할지를 결정한다. Isolation Modes는 Kotest 사용 시 반드시 알아두어야 한다. 왜냐하면 이 설정을 통해 테스트 성능을 향상시킬 수도, 인스턴스 재사용으로 인한 원치않는 테스트 오류도 방지할 수 있기 때문이다.
Configuration
Isolation Mode를 설정하는 방법은 3가지가 있다. 상황에 맞게 원하는 방식을 선택하여 사용하면 되겠다.
DSL
internal class ConfigurationTest : FreeSpec({
    isolationMode = IsolationMode.SingleInstance

    "some test" {
        "".length shouldBe 0
    }
})
function overrides
internal class FunctionOverridesTest : FreeSpec() {
    override fun isolationMode() = IsolationMode.SingleInstance

    init {
        "some test" {
            "".length shouldBe 0
        }
    }
}
Global Isolation Mode
글로벌 설정을 하면 기본 Isolation Mode를 변경할 수 있다.
object GlobalIsolationConfiguration : AbstractProjectConfig() {
    override val isolationMode = IsolationMode.SingleInstance
}
Isolation Mode는 총 3가지가 있다. SingleInstance, InstancePerLeaf, InstancePerTest이다. 각 Mode에 대해 알아보자.
SingleInstance
SingleInstance는 이름에서 유추할 수 있듯이 하나의 인스턴스로 Spec class를 생성한다. 그리고 이 Mode는 기본 Mode이기 때문에 테스트 코드 작성시 항상 이 부분을 염두해 두어야 한다.
class SingleInstanceModeTest : FreeSpec({
    isolationMode = IsolationMode.SingleInstance
    val that = this

    "a" - {
        println("a: $that")
        "b" - {
            println("b: $that")
            "c" {
                println("c: $that")
            }
        }
    }

    "d" - {
        println("d: $that")
        "e" - {
            println("e: $that")
            "f" {
                println("f: $that")
            }
        }
    }
})
a: com.example.demo.isolationMode.SingleInstanceModeTest@536b4bbf
b: com.example.demo.isolationMode.SingleInstanceModeTest@536b4bbf
c: com.example.demo.isolationMode.SingleInstanceModeTest@536b4bbf
d: com.example.demo.isolationMode.SingleInstanceModeTest@536b4bbf
e: com.example.demo.isolationMode.SingleInstanceModeTest@536b4bbf
f: com.example.demo.isolationMode.SingleInstanceModeTest@536b4bbf
InstancePerTest
InstancePerTest는 내부 컨텍스트를 포함해서 모든 테스트 케이스에 대해 새로운 인스턴스를 생성한다. 이는 모든 테스트 케이스가 독립적으로 수행될 수 있음을 보장하지만 그만큼 자원을 많이 소모하므로 이점을 염두해 두고 해당 Mode를 선택하길 바란다.
class InstancePerTestModeTest : FreeSpec({
    isolationMode = IsolationMode.InstancePerTest
    val that = this

    "a" - {
        println("a: $that")
        "b" - {
            println("b: $that")
            "c" {
                println("c: $that")
            }
        }
    }

    "d" - {
        println("d: $that")
        "e" - {
            println("e: $that")
            "f" {
                println("f: $that")
            }
        }
    }
})
a: com.example.demo.isolationMode.InstancePerTestModeTest@228bb678
a: com.example.demo.isolationMode.InstancePerTestModeTest@5490ceab
b: com.example.demo.isolationMode.InstancePerTestModeTest@5490ceab
a: com.example.demo.isolationMode.InstancePerTestModeTest@112a4d39
b: com.example.demo.isolationMode.InstancePerTestModeTest@112a4d39
c: com.example.demo.isolationMode.InstancePerTestModeTest@112a4d39
d: com.example.demo.isolationMode.InstancePerTestModeTest@120fc128
d: com.example.demo.isolationMode.InstancePerTestModeTest@13820714
e: com.example.demo.isolationMode.InstancePerTestModeTest@13820714
d: com.example.demo.isolationMode.InstancePerTestModeTest@677244f8
e: com.example.demo.isolationMode.InstancePerTestModeTest@677244f8
f: com.example.demo.isolationMode.InstancePerTestModeTest@677244f8
InstancePerLeaf
InstancePerLeaf는 테스트 케이스 마다 새로운 인스턴스를 생성하지만 InstancePerTest와는 다르게 내부 컨텍스트에서는 새로운 인스턴스를 생성하지 않는다.
class InstancePerLeafTestModeTest : FreeSpec({
    isolationMode = IsolationMode.InstancePerLeaf
    val that = this

    "a" - {
        println("a: $that")
        "b" - {
            println("b: $that")
            "c" {
                println("c: $that")
            }
        }
    }

    "d" - {
        println("d: $that")
        "e" - {
            println("e: $that")
            "f" {
                println("f: $that")
            }
        }
    }
})
a: com.example.demo.isolationMode.InstancePerLeafTestModeTest@2fe01e68
b: com.example.demo.isolationMode.InstancePerLeafTestModeTest@2fe01e68
c: com.example.demo.isolationMode.InstancePerLeafTestModeTest@2fe01e68
d: com.example.demo.isolationMode.InstancePerLeafTestModeTest@5a0e7bb7
e: com.example.demo.isolationMode.InstancePerLeafTestModeTest@5a0e7bb7
f: com.example.demo.isolationMode.InstancePerLeafTestModeTest@5a0e7bb7
Data Driven Testing
동일한 테스트 케이스에 대해 다양한 데이터를 테스트 하고자 하는 경우 Data Driven Testing을 활용하면 유용할 수 있다. withData를 활용한 Data Driven Testing은 4.6.0버전 이후로 지원하니 버전을 확인하길 바란다. Data Driven Testing을 사용하기 위해서는 kotest-framework-datatest모듈을 추가해주어야 한다.
Configuration
testImplementation("io.kotest:kotest-framework-datatest:<version>")
Test Code
@ExperimentalKotest
internal class WithDataTest : FunSpec({
    context("string length test") {
        withData(
            StringLengthTuple("hello", 5),
            StringLengthTuple("kotest", 6),
            StringLengthTuple("hello kotest!", 13),
            StringLengthTuple("", 0),
        ) { (str, expected) ->
            str.length shouldBe expected
        }
    }
})

data class StringLengthTuple(
    val str: String,
    val expected: Int,
)
4.6.0 이전버전의 Data Driven Testing은 아래와 같이 사용할 수 있다. withData를 활용하는 방법도 좋지만 Data Class를 생성하지 않는 기존 Data Driven Testing 방법도 나쁘진 않다.
internal class ForAllTest : StringSpec({
    "string length test" {
        forAll(
            row("hello", 5),
            row("kotest", 6),
            row("hello kotest!", 13),
            row("", 0),
        ) { str, expected ->
            str.length shouldBe expected
        }
    }
})
Mocking
Kotest는 자체적으로 Mocking 라이브러리는 존재하지 않고 Mocking을 이용한 테스트를 하고자 한다면 내장된 mockk라이브러리를 이용하면된다.
이글에서 사용된 4.6.1 버전에서는 내장된 mockk라이브러리에 이슈가 있어 mockk 라이브러리의 1.12.0 버전을 추가해주어야 정상 동작한다. 추후 버그 픽스를 통해 해당 의존성의 추가는 불필요할 수 있으니 버전을 참고해서 추가해주길 바란다.
testImplementation("io.mockk:mockk:1.12.0")
아래 코드는 mockk을 이용한 간단한 사용법만 적어보았다. 좀 더 다양한 케이스에 대한 내용은 이글의 취지에 조금 벗어날 수 있으므로 mockk 페이지에서 확인하자.
Test Code
internal class MockkTest : FunSpec({
    val repository = mockk<FooRepository>()
    val sut = FooService(repository)

    test("save test") {
        val foo = Foo(id = UUID.randomUUID().toString(), title = UUID.randomUUID().toString())
        every { repository.save(foo) } just Runs

        sut.save(foo)

        verify { repository.save(foo) }
    }

    test("get by id test") {
        val id = UUID.randomUUID().toString()
        val foo = Foo(id = UUID.randomUUID().toString(), title = UUID.randomUUID().toString())
        every { repository.findById(id) } returns Optional.of(foo)

        val actual = sut.getById(id)

        actual shouldBe foo
    }
})

class FooService(private val repository: FooRepository) {
    fun save(data: Foo) {
        repository.save(data)
    }
    fun getById(id: String): Foo {
        return repository.findById(id).orElseThrow()
    }
}

interface FooRepository {
    fun save(data: Foo)
    fun findById(id: String): Optional<Foo>
}

data class Foo(
    val id: String,
    val title: String,
)
Jacoco
Jacoco는 자바 코드 커버리지 라이브러리로 내가 작성한 테스트 코드가 운영코드를 얼마만큼 커버해주는지 알 수 있도록 도와주는 도구이다. 보고서 기능과 함께 테스트 커버리지를 충족하지 못하면 빌드를 실패하 하는 등 테스트 코드를 강제할 수 있는 기능이 있어 유용하게 사용할 수 있다.
Gradle의 The JaCoCo Plugin을 보면 손쉽게 적용할 수 있는데, Kotest에서 통합기능으로 제공해 주니 아주 반가운 일이다.
Settings
plugins {
    jacoco
}

tasks.jacocoTestReport {
    reports {
        html.required.set(true)
    }
}
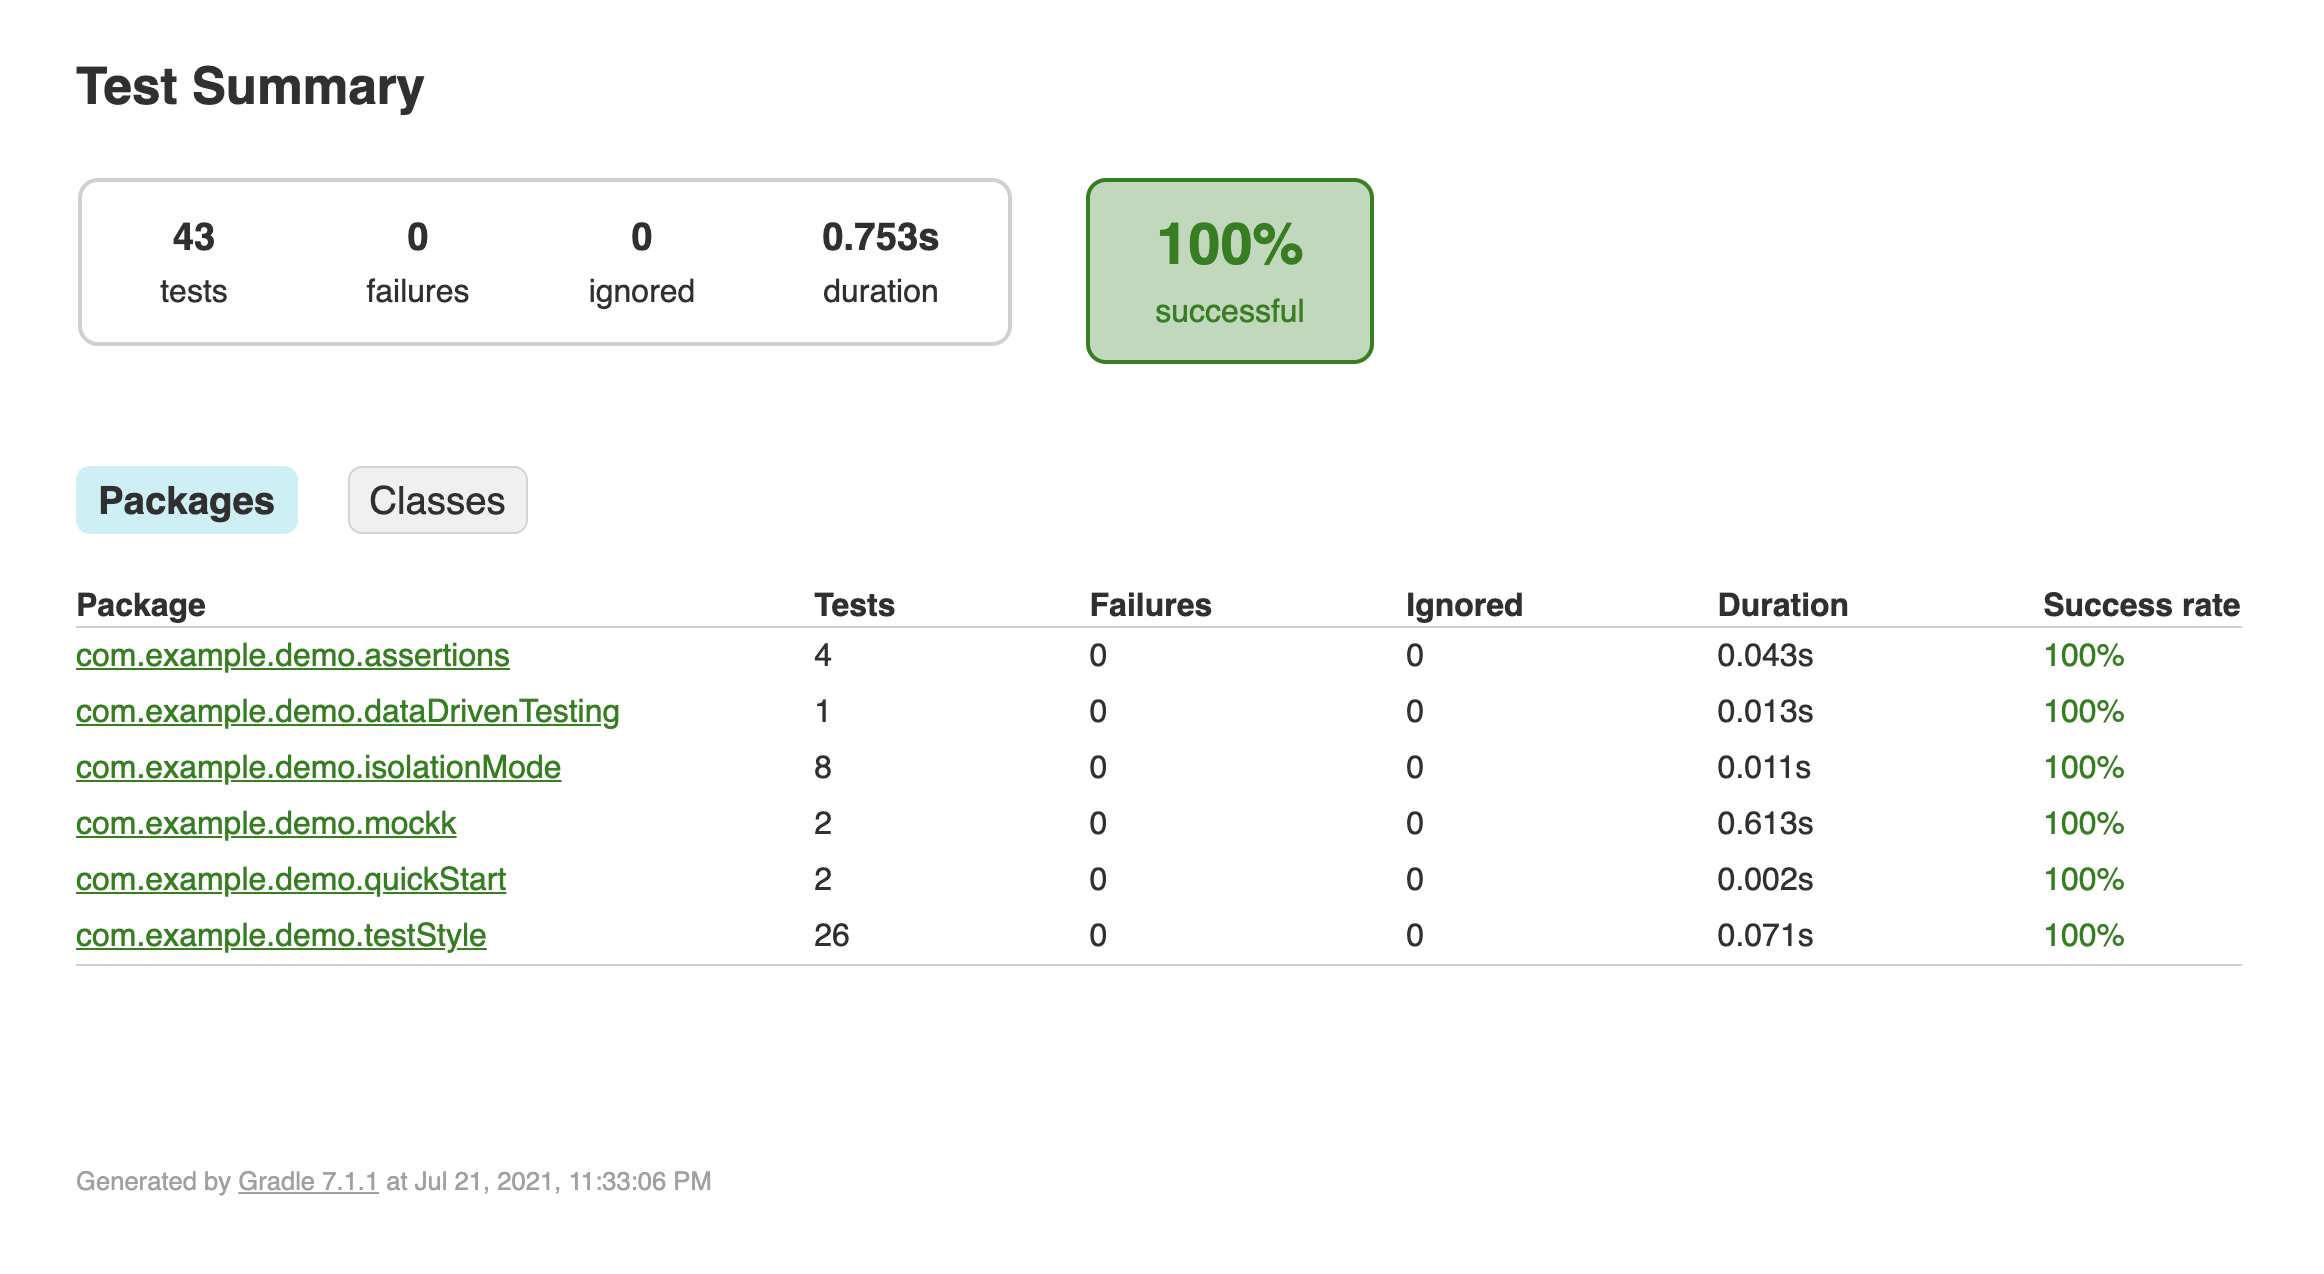
Report
아무 설정을 하지 않으면 빌드 시 <project>/build/reports/tests/test/index.html에 보고서 파일이 생성됨을 볼 수 있다.
Extensions
Kotest는 많은 프레임워크 또는 라이브러리 통합을 지원한다. 그중에 내가 사용해본 Extension을 소개해 본다.
Spring
스프링에서 사용하는 빈 객체나 테스트 어노테이션들을 지원해줌으로써 스프링 프로젝트에서 테스트 코드를 쉽게 작성할 수 있도록 도와준다.
Dependency
testImplementation("io.kotest.extensions:kotest-extensions-spring:1.0.0")
Configuration
모든 테스트에 대해 SpringExtension을 적용하려면 글로벌 설정을 통해서 설정이 가능하다.
class GlobalProjectConfig : AbstractProjectConfig() {
    override fun extensions() = listOf(SpringExtension)
}
하지만 때로는 SpringExtension을 이용하지 않고 테스트를 사용하고 싶을 수도 있다. 이런경우 글로벌 설정을 하지 않고 SpringExtension을 사용하는 테스트 클래스에서만 extensions를 설정해서 사용할 수도 있다.
internal class SpringTest : FunSpec() {
    override fun extensions() = listOf(SpringExtension)

    // some code
}
Test Code
@SpringBootTest(classes = [FooService::class])
internal class SpringTest(fooService: FooService) : FunSpec() {
    override fun extensions() = listOf(SpringExtension)

    init {
        test("getFoo test") {
            val actual = fooService.getFoo()
            actual shouldBe Foo("id", "foo")
        }
    }
}

@Service
class FooService {
    fun getFoo(): Foo {
        return Foo("id", "foo")
    }
}

data class Foo(
    val id: String,
    val title: String,
)
MockServer
MockServer는 가상의 HTTP 서버를 제공해준다. 이 라이브러리를 사용하면 별도로 Mocking 라이브러리(mockk 등)를 사용하지 않고 실제 서버와 통신하는 것과 같이 테스트를 수행할 수 있다.
Dependency
testImplementation("io.kotest.extensions:kotest-extensions-mockserver:1.0.0")
Test Code
listener를 추가하고 beforeTest를 통해 요청과 응답을 설정하면 HTTP 서버와 통신하는 테스트 코드를 작성할 수 있다.
class MockServerTest : FunSpec({
    val restTemplate = RestTemplateBuilder()
        .rootUri("http://localhost:8080")
        .build()

    listener(MockServerListener(8080))

    beforeTest {
        MockServerClient("localhost", 8080).`when`(
            HttpRequest.request()
                .withMethod("POST")
                .withPath("/foo")
                .withHeader("Content-Type", "application/json")
                .withBody(
                    json(
                        """{
                          "id" : "test-id",
                          "title" : "test-title"
                        }
                        """.trimIndent()
                    )
                )
        ).respond(
            HttpResponse.response()
                .withStatusCode(201)
        )
    }

    test("post test") {
        val actual = restTemplate.postForEntity(
            "/foo",
            Foo("test-id", "test-title"),
            Unit::class.java
        )
        actual.statusCode shouldBe HttpStatus.CREATED
    }
})

data class Foo(val id: String, val title: String)
별도의 TestListener를 만들어서 사용하면 위 테스트 코드를 좀더 심플하게 사용할 수 있다.
internal class TestListenerMockServerTest : FunSpec({
    val restTemplate = RestTemplateBuilder()
        .rootUri("http://localhost:8080")
        .build()

    listeners(MockServerListener(8080), MockServerTestListener())

    test("post test") {
        val actual = restTemplate.postForEntity(
            "/foo",
            Foo("test-id", "test-title"),
            Unit::class.java
        )
        actual.statusCode shouldBe HttpStatus.CREATED
    }
})

data class Foo(val id: String, val title: String)

internal class MockServerTestListener : TestListener {
    override suspend fun beforeTest(testCase: TestCase) {
        MockServerClient("localhost", 8080).`when`(
            HttpRequest.request()
                .withMethod("POST")
                .withPath("/foo")
                .withHeader("Content-Type", "application/json")
                .withBody(
                    JsonBody.json(
                        """{
                          "id" : "test-id",
                          "title" : "test-title"
                        }
                        """.trimIndent()
                    )
                )
        ).respond(
            HttpResponse.response()
                .withStatusCode(201)
        )
    }
}
Property Testing
테스트를 수행할때 보통 fixture를 만들어서 테스트 값을 생성한 후 단언을 수행하곤 한다. 주어진 스토리에 맞는 테스트 코드를 작성한다면 이로써 충분할 수도 있다. 하지만 스토리에 누락되거나 개발자가 미처 인지하지 못한 케이스에 대한 오류는 쉽사리 잡아내기 쉽지 않을 수 있다. 만약 주어진 값을 테스트 시 자동으로 다양하게 생성해준다면 앞서 말한 문제점을 일부 해결할 수 있을 것이다. 이렇게 테스트 데이터를 자동으로 랜덤하게 생성하여 테스트 할 수 있도록 도와주는 Kotest의 모듈이 바로 Property Testing이다.
다만 fixture를 이용한 테스트가 더 나은 경우가 많으므로 Property Testing를 사용하기에 적절한 테스트인지 고민후에 사용하면 좋겠다.
Dependency
먼저 Property Testing을 사용하려면 아래 의존성을 추가해야 한다.
dependencies {
   testImplementation("io.kotest:kotest-property:4.6.1")
}
Test Functions
Property Test는 2개의 함수를 사용한다. forAll과 checkAll인데 두개의 차이점은 forAll의 경우 boolean 값으로 검증한다는 것이고 checkAll은 Assertions를 통해 검증한다는 것이다.
internal class PropertyTestFunctionTest : StringSpec({
    "toString returns class properties using forAll" {
        forAll<Int, String> { id, title ->
            val sut = Foo(id, title)
            val actual = sut.toString()
            actual == "Foo(id=$id, title=$title)"
        }
    }

    "toString returns class properties using checkAll" {
        checkAll<Int, String> { id, title ->
            val sut = Foo(id, title)
            val actual = sut.toString()
            actual shouldBe "Foo(id=$id, title=$title)"
        }
    }
})

data class Foo(val id: Int, val title: String)
Custom Generator
Kotest는 Generator를 통해 Property Testing에서 생성하는 랜덤 데이터의 범위를 지정할 수 있는데, 특정 객체에 제약조건이 존재하는 경우 랜덤 데이터 생성 시 원치않는 오류가 생길 수 있으므로 랜덤 데이터의 생성 범위를 지정할 때 유용하게 사용할 수 있다.
internal class GeneratorTest : StringSpec({
    "toString returns class properties using checkAll" {
        checkAll(barArb) { bar ->
            bar.id shouldBeLessThan 20
            bar.title.length shouldBeGreaterThanOrEqualTo 5
            bar.title.length shouldBeLessThanOrEqual 30
        }
    }
})

val barArb = arbitrary { rs ->
    val id = Arb.int(0, 19).next(rs)
    val title = Arb.string(5, 30).next(rs)
    Bar(id, title)
}

data class Bar(val id: Int, val title: String) {
    init {
        require(id < 20)
        require(title.length in 5..30)
    }
}
IntelliJ Plugin
Kotest는 IntelliJ에서 손쉽게 테스트를 수행할 수 있도록 IntelliJ Plugin을 제공한다. 플러그인은 marketplace에서 설치하면 된다.
Github
본 글에서 사용한 코드는 Github에서 확인할 수 있으니 참고하자.
Wrap Up
지금까지 Kotest에 대해 알아보았다. 공식 홈페이지에서 소개하는 모든 내용을 소개하진 않았다. 대표적인 기능만 소개했으니 좀더 자세히 알아보고자 한다면 공식 홈페이지를 참고하자. 이 글을 통해 좀더 Kotest를 활용할 수 있으면 좋겠다.